The speed sensor is a crucial component in your Harley motorcycle. It monitors your bike’s speed and transmits the data to the engine control module (ECM), which then uses the information to manage various systems such as fuel injection, ignition timing, and electronic stability control. A properly functioning speed sensor ensures optimal performance, fuel efficiency, and safety for riders.
Like any other component, the speed sensor can develop problems over time. Some common issues include erratic speedometer readings, loss of power, poor fuel efficiency, and difficulty shifting gears. This guide will help you locate, inspect, and troubleshoot your Harley’s speed sensor to keep your motorcycle running smoothly.
Locating Your Harley Speed Sensor
Tools You’ll Need
Before getting started, gather the necessary tools for locating and inspecting your speed sensor. These include:
- A flashlight or work light
- A motorcycle lift or stand
- A service manual for your specific Harley model
- A digital multimeter (for testing the sensor)
Identifying the Speed Sensor Location on Different Harley Models
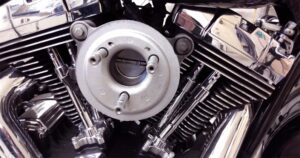
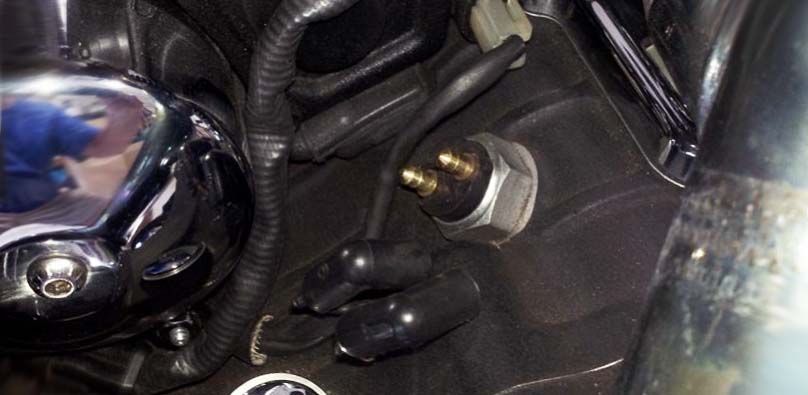
The speed sensor location can vary depending on your Harley model. Generally, you can find it near the transmission, mounted on the engine crankcase, or near the rear wheel. Consult your service manual for the exact location of the speed sensor on your specific model.
Inspecting and Troubleshooting the Speed Sensor
Checking for Damage
Once you’ve located the speed sensor, visually inspect it for any signs of damage, corrosion, or debris. If the sensor appears damaged, it may need replacement.
Cleaning the Speed Sensor
Sometimes, a dirty speed sensor can cause issues with your motorcycle’s performance. Use a clean cloth and contact cleaner to gently clean the sensor and surrounding area, taking care not to damage any wiring.
Testing the Speed Sensor
If the sensor appears undamaged and clean, use a digital multimeter to test its function. Consult your service manual for the proper testing procedure and voltage readings.
Replacing the Speed Sensor
When to Replace
If the speed sensor fails the testing procedure or is visibly damaged, it’s time to replace it with a new one.
Choosing the Right Replacement Sensor
When buying a replacement speed sensor, make sure to choose one that is compatible with your Harley model and meets OEM specifications. To ensure optimal performance, opt for an original equipment manufacturer (OEM) sensor rather than a generic version.
Step-by-Step Replacement Guide
Follow this step-by-step guide to safely and correctly replace your speed sensor:
- Secure the motorcycle in place using a motorcycle lift or stand, ensuring it won’t move during the process
- Use an appropriate tool to remove the mounting bolts on the old speed sensor and disconnect any wiring
- Attach the new speed sensor securely to its mount and connect any wiring according to your service manual
- Test and double check all connections are properly secured before running your bike
- Lower the motorcycle from its lift or stand and take it for a test ride to ensure everything is working properly
Preventive Maintenance and Tips
Regular Inspection
It’s important to regularly inspect your Harley’s speed sensor for signs of damage or wear in order to maintain optimal performance and fuel efficiency, as well as safety for riders.
Keeping Your Harley Clean
Regularly cleaning and protecting your Harley from dirt and moisture can help prevent sensor damage and prolong its lifespan. Make sure to clean the speed sensor itself with a contact cleaner to avoid any problems.
Protecting Your Speed Sensor from Damage
In addition to regular inspections and cleaning, you can also protect your speed sensor by covering it with a protective guard or shield when riding on rough roads or off-road trails. This will help prevent debris from getting into the sensor and damaging it.
The Harley-Davidson Wheel Spacer Chart is your go-to guide for finding the perfect wheel spacers for your bike. Our complete chart lists all available wheel spacers and their specifications, including widths, thicknesses, and thread pitch so you can find the right fit for your needs.
Conclusion
Locating and understanding your Harley’s speed sensor is key to keeping your motorcycle running smoothly and safely for years to come. From locating the correct location of the speed sensor, inspecting it for any signs of damage, testing its function, replacing it when necessary, to taking preventive measures such as regular inspection, keeping your bike clean, and protecting the speed sensor from debris—we hope this guide gave you all the information you need to keep your ride running optimally at all times.